
The journal
Can you screw directly into plaster walls? A practical guide
Identify what is behind your plaster before choosing screws or anchors. Compare studs, masonry and hollow walls, with checks before hanging a shelf.

Identify the backing before you choose a fixing
| Behind the plaster | Fixing approach | Check first |
|---|---|---|
| Timber stud | A suitable screw that engages sound timber beyond the plaster | Stud position, concealed services and screw specification |
| Solid masonry | An anchor specified for the brick, block or concrete behind the finish | Substrate condition, hole size and anchorage depth |
| Hollow lath-and-plaster or plasterboard | A fixing explicitly approved for that wall construction and thickness | Cavity clearance, wall condition and the loaded shelf's leverage |
A shelf's own weight is only part of the load: books, brackets and distance from the wall also matter. Do not transfer a fixing's advertised capacity from one substrate to another or assume that two fixings simply double it. If you cannot identify the construction or the plaster is loose, stop and have the mounting assessed.
Our plaster-wall shelf guide covers the shelf layout, while the wall preparation guide covers the surface. Manufacturer examples such as fischer's dot-and-dab fixing show why construction-specific instructions matter.
Short answer: can you screw directly into plaster walls?
Quick bottom-line answer
Do not rely on a screw gripping only the plaster finish. Identify the backing, then use a suitable stud fixing, masonry anchor or fixing approved for the hollow wall construction.
For small decorative items, use a picture fixing approved for that surface and load. Shelving and cabinets require a mounting plan that accounts for the wall construction and the fully loaded item.
Can you screw directly into plaster walls?
A screw needs a suitable fixing into sound backing, such as a timber stud, or an anchor approved for the actual masonry or hollow-wall construction. Plaster condition alone does not establish a safe load.
When a direct screw is acceptable
A screw passing through plaster can be suitable when it engages sound timber behind it to the fixing manufacturer's specified depth. This is different from asking the plaster finish to hold the screw. Loose plaster, an unidentified backing or an unverified fixing makes the mounting unsuitable until assessed.
Assessing that condition and choosing the right fastener is covered later, and the preservation guidance used for older plaster remains central to deciding which backing and fixing are suitable NPS Preservation Brief 21 on repairing historic flat plaster
Assess the plaster and wall type before you drill
Signs of failing or delaminated plaster
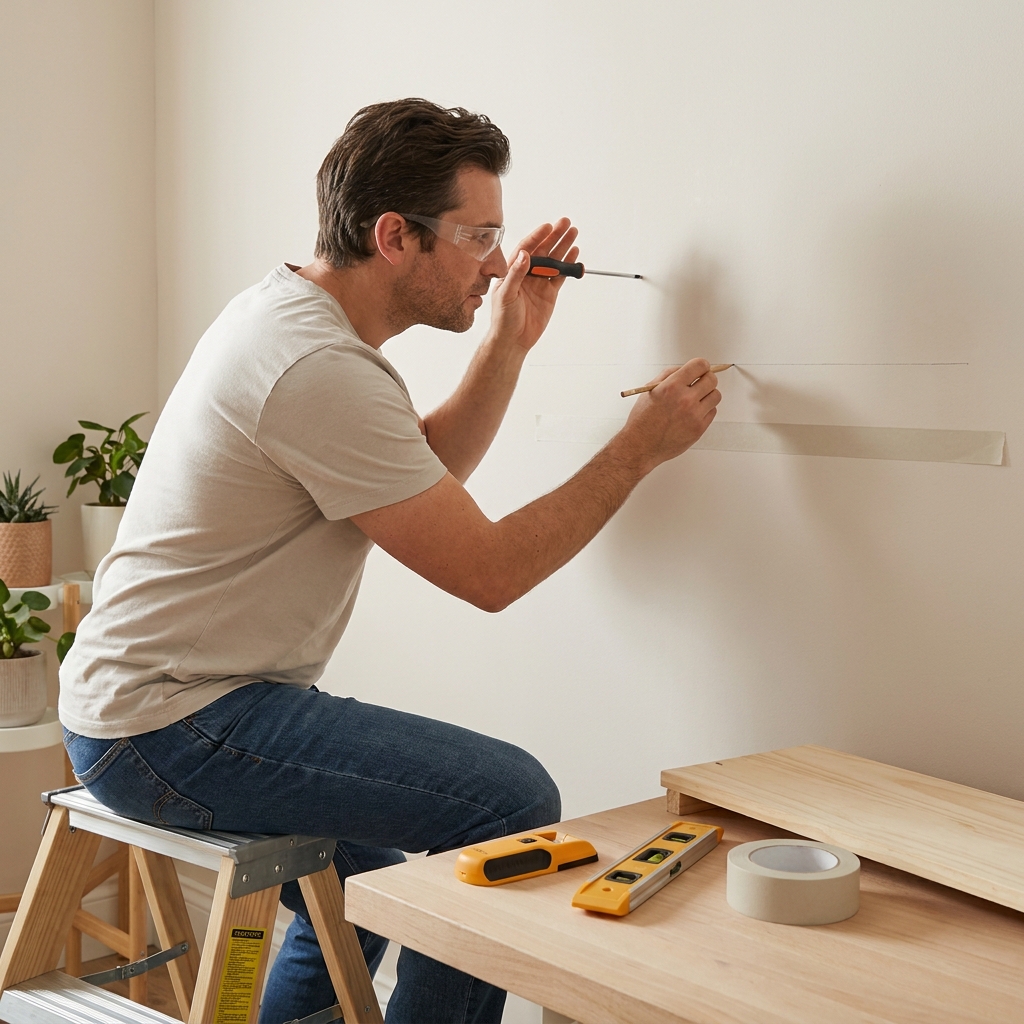
Before you plan any fastening, visually and physically inspect the wall for soft, powdery areas, wide cracks that run along seams, blisters, or sections that sound hollow when tapped; these are common signs that plaster has delaminated from its backing and will not hold screws or anchors reliably.
A gentle tap test across the surface helps reveal hollow spots where the plaster has separated from its backing layers, and water staining or crumbling finish are red flags that call for repair before you hang anything substantial NPS Preservation Brief 21 on repair guidance and see our repair guide
How to tell lath-and-plaster from modern drywall
Lath-and-plaster walls are usually thicker and feel layered; you may notice narrow wood lath strips near an exposed edge or behind trim, and nail heads or nail pops at trim lines can indicate the presence of a wood stud pattern behind lath. Drywall is a uniform gypsum board that lacks that layered feel.
If you are uncertain, inspect at an unobtrusive trim edge or behind baseboard to see whether there is a plaster skim over wood lath; this step helps you plan for anchors that work in hollow lath-and-plaster as opposed to anchors made for gypsum board InterNACHI’s overview of lath and plaster walls
Inspect plaster and locate studs before drilling
Anchors and fasteners: which to use for plaster walls
Overview of anchor types: molly, toggle, plastic plugs
In hollow lath-and-plaster, molly sleeve anchors and spring-toggle bolts are generally more reliable than simple plastic expansion plugs because they expand or brace behind the cavity rather than relying on fragile surface material to hold the load and see a comparative test of anchor types at abutterflyhouse. See also our wall-mounting guide
Plastic expansion plugs can work for lightweight fixtures in sound plaster but tend to have lower, less reliable holding power in hollow conditions; choose anchors rated for hollow-wall use when the backing is not solid. See product selection at Home Depot.
When to choose a molly or spring-toggle versus a plastic anchor
Choose a molly or spring-toggle when you expect any moderate shear or pull on the fastener or when the plaster is thin over a cavity; these anchors spread load behind the wall and reduce stress on the plaster surface.
For mere decoration or very light frames, a well-seated plastic plug or picture hanger may be acceptable if the plaster is consolidated and sound, but for shelves and fixtures that will see regular use, favor molly or spring-toggle anchors and follow conservative loading assumptions described in modern DIY guidance The Spruce guidance on anchor selection
How to avoid cracking: pilot holes, tape, and drilling technique
To reduce the chance of cracking or surface blowout, always pre-drill a pilot hole sized to the anchor, avoid hammer-drill settings which can shatter plaster, and place a strip of masking tape over the drill entry to help prevent chipping or spalling of the finish.
Pre-drilling to the anchor manufacturer’s recommended diameter and driving anchors gently until they seat will protect the plaster surface and give the anchor a chance to engage properly; hands-on how-to sources emphasize these steps to limit damage during installation
When and how to find and use studs
For heavy shelves and cabinets you should fasten into studs whenever possible because a screw into a wood stud gives far more reliable support than an anchor in hollow plaster; recent practical guides stress studs for substantial loads.
Magnetic stud finders that detect nails or screws, or simple probing near baseboards and trim to locate fastener lines, are common methods to find studs behind lath; remember that the lath layer can confuse some electronic stud finders so combine methods for best results InterNACHI’s stud-finding notes
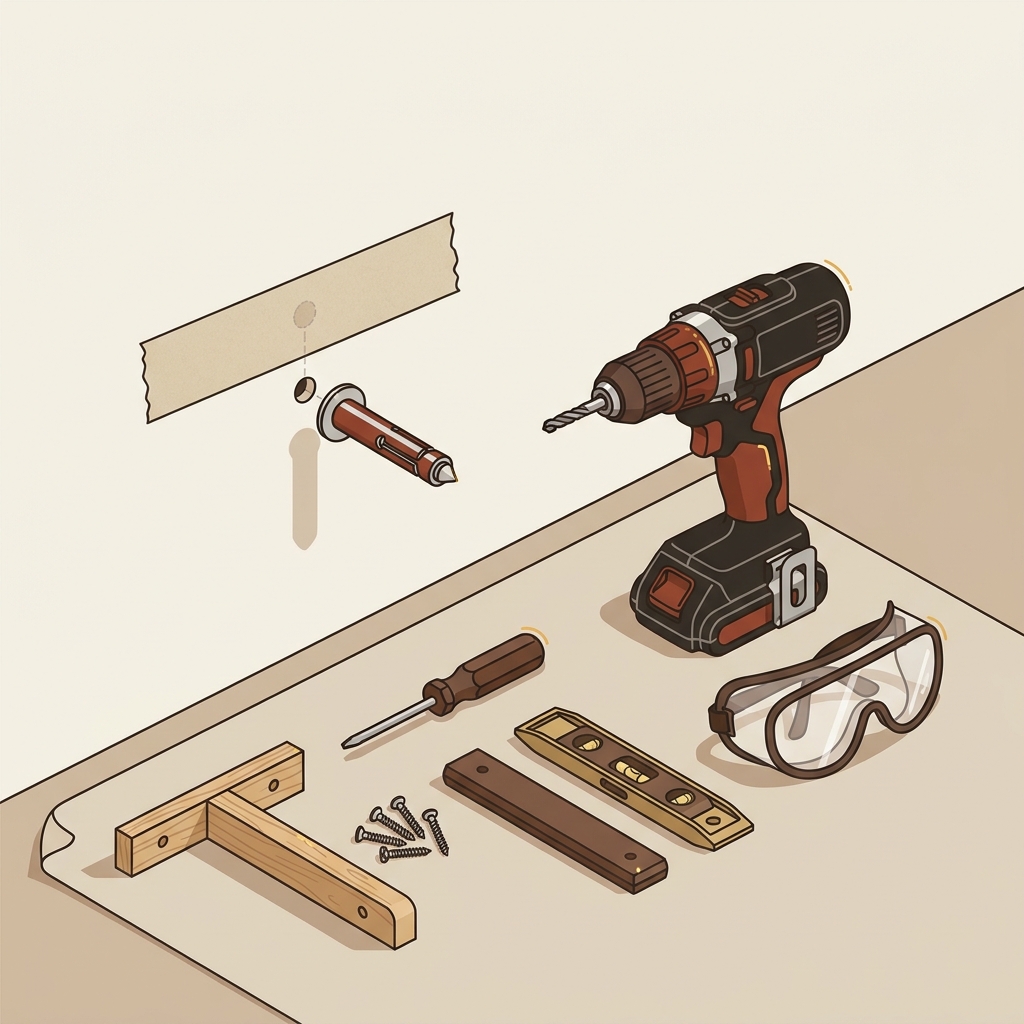
When you have located studs, use screws long enough to travel through the plaster and into the stud so the screw threads bite into wood, but avoid over-penetration into wires or plumbing behind the stud face; a pilot hole sized to the screw shank helps prevent splitting the stud.
If a shelf spans multiple studs, use a ledger or cleat to spread the load across two or more anchor points so the weight is shared, and always use screws sized and rated for structural fastening as recommended for carpentry and installation guidance The Spruce on mounting heavy items and consult our measuring and planning guide when laying out multiple fasteners.
Common mistakes and how to avoid them
Why plaster cracks and how to prevent it
Plaster can crack when fasteners are driven without pilot holes, when a hammer-drill setting is used, or when the plaster is already delaminated; these lead to blowout where the anchor spins or pulls through the surface.
Simple preventive steps include taping the drill entry, drilling the correct pilot size, and stopping when the anchor seats rather than forcing it; if plaster shows powdery or loose areas, repair or consolidate it before anchoring to avoid further damage
Don’t rely on a single small anchor for heavy loads
A frequent mistake is trusting one small plastic anchor to bear a significant load; for moderate loads use multiple anchors or a ledger, and for heavy loads secure into studs.
If an anchor spins during installation, remove it, inspect the hole, and either repair the plaster or use a different anchor type; many guides recommend erring on the conservative side for rated loads in plaster and to test before fully loading a shelf Bob Vila on anchor troubleshooting
Step-by-step examples and quick checklist
Light shelf under a handful of pounds
Scenario: a small, narrow shelf for lightweight decor on sound plaster. Steps: inspect the plaster surface, choose a short screw or picture hook suitable for a light load, mark and pilot a small guide hole, and screw in gently until the head seats without cracking the finish.
Test the installation by applying light downward pressure and watching for movement or surface cracking; if any give appears, remove and reassess plaster condition before trying an anchor or stud mount The Spruce practical steps
Moderate shelf supported by anchors
Scenario: a shelf that will hold ceramics, books in small numbers, or kitchen items of modest weight. Steps: inspect plaster, choose molly or spring-toggle anchors sized for the shelf, measure and mark the horizontal line and vertical points, drill pilot holes to the anchor diameter with tape over the entry, install anchors per the manufacturer instructions, then mount the shelf hardware and test gently before loading.
Space multiple anchors evenly and follow conservative load assumptions; when in doubt, use more anchors and consider a cleat or short ledger under the shelf to distribute force across a wider area This Old House anchor selection and installation and see retailer recommendations at A S H A N G I N G
Heavy shelf or cabinet mounted to studs
Scenario: a substantial shelf, cabinet, or unit that will hold heavy items. Steps: locate studs using a magnetic finder or by probing near trim, mark stud centers, use pilot holes sized for structural screws, fasten a ledger to the studs if the shelf spans multiple points, and then attach the shelf to the ledger and studs with appropriate screws, testing carefully before full loading.
For heavy items always prioritize stud mounting over anchors in hollow plaster and follow the conservative structural guidance in modern how-to sources to avoid failure under load The Spruce on heavy mounting
Quick checklist before you drill or screw
- Inspect plaster for delamination or moisture damage
- Decide load plan: identify the backing, choose a fixing specified for that construction, and account for the fully loaded item
- Choose anchor type and size or locate studs
- Mark, tape over drill entry, and pre-drill pilot holes
- Install anchors or screw to studs and test gently before full loading

Frequently asked questions
Can I use a standard drywall anchor in plaster?
Standard plastic drywall anchors may work for very light items in sound plaster, but for hollow lath-and-plaster choose molly or spring-toggle anchors for more reliable support and follow conservative load assumptions.
How do I know if my plaster is safe to hold a shelf?
Check for hollow-sounding areas when tapped, powdery or crumbling patches, wide cracks, or water damage; if these signs appear, repair or consolidate the plaster before fastening.
What tools do I need to hang shelves on plaster walls?
Basic tools include a magnetic stud finder or probe, a set of small drill bits for pilot holes, tape to protect the surface, and anchors or screws sized for your chosen mounting method.
If you find loose or delaminated plaster, address repair before attaching shelves; repairing plaster first is the safest route to a lasting installation. When in doubt about structural issues or extensive deterioration, consult a professional to assess and repair the wall before mounting heavy fixtures.
Product options for this topic
As an Amazon Associate I earn from qualifying purchases. These are researched options, not hands-on test results. Check the exact size or model, current price and availability on Amazon.
| Product option | Fit and limits to check | Retailer |
|---|---|---|
| Product imageKlein Tools 32500 11-in-1 screwdriver | Several common bit shapes in one hand tool for household assembly. Match the bit to the fastener; this is not an insulated electrical-work tool. | View on Amazon |
| Product imageRYOBI PCL206B drill/driver, tool only | A cordless drill/driver option within the ONE+ system. This listing is tool-only: check compatible battery and charger requirements. | View on Amazon |